# Git Setup & Making a Repository
# Git Setup
It is possible that you already have a copy of Git in your Mac. To check, go to you shell and type:
git --version
1
You should see a message showing what is the version you have installed. It may look like this:
git version 2.24.3 (Apple Git-128)
1
If you don't have it already, go to this link (opens new window) download it and install it. After it is installed, try git --version one more time.
Ok, now that you have git installed, let us configure your name and email. Here is what you need to do:
git config --global user.name "Your Name"
1
and
git config --global user.email "your@email.com"
1
# Steps to Follow to set up a Repo for an Assignment
Note
These are generic instructions about getting started with new repos to use in your assignments.
# 1. Always Start with Your Own Repo on GitHub
- Create a Private GitHub Repo called
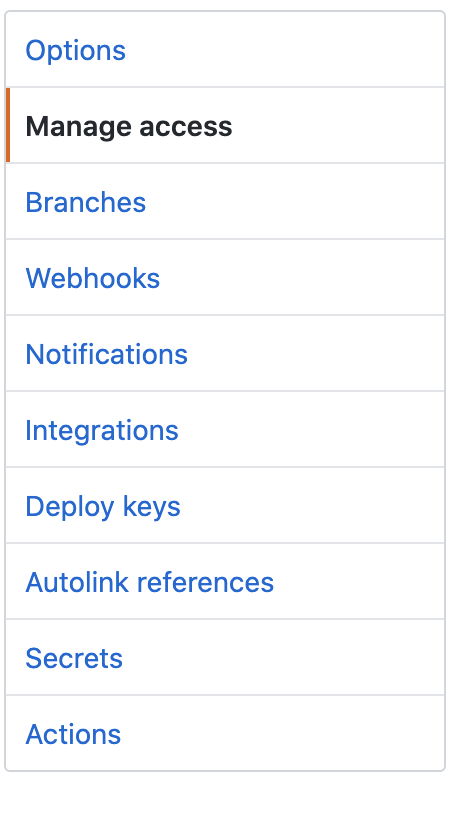
whatever the assignment asked you to createon your GitHub account, without aREADME.mdfile. - On the GitHub settings for your repo, go to the
Manage Accesslink on the left side of the page and invite your instructor to the repo as a collaborator. For example, on GitHub, Adam's username isarobillard.
# 2a. Using a Copy of an Instructor's Repo
- Sometimes you will start with a repo provided by your instructor. If you do NOT have one of these then skip to step 3.
- Start in Terminal (MacOS) or Command Shell (Windows) by navigating to the folder where you want to create your own copy of the repo.
- Next, clone their repo Eg: https://github.com/instructorsname/reponame on to your computer by typing the following in the Terminal:
git clone https://github.com/instructorsname/reponame.git reponame
1
- Make sure you change the user name and repo names to the proper ones.
- the second
reponameis the name of the folder you will be creating. - Next DELETE the
.gitfolder inside yourreponamefolder with the following commands:
cd reponame
rm -rf .git
1
2
2
- replace
reponamewith your actual folder name. - Now we need to turn our folder into a Git repo on our computer and point it at the one that we created on GitHub.
git init
git remote add origin https://github.com/[YOUR USERNAME]/reponame.git
1
2
2
- IF you did create a repo with a
README.mdfile on GitHub or you changed the repo or added files through the GitHub interface then we need to download that file before adding our own. Type this to download all files from your own repo on GitHub:
git pull -u origin master
1
If there was nothing new to download then the pull command will give a warning.
# 2b. Starting with Your Own Github Repo
- If you were not provided with a starter repo, and just created one of your own on GitHub then the steps are similar.
- You will need to clone your own repo from GitHub to a local folder.
- Start by navigating with Terminal (MacOS) or Command Shell (Windows) to the place where you want to create the repo.
- Next clone your repo by typing the following:
git clone https://github.com/[YOUR USERNAME]/reponame.git reponame
1
- replace the username and reponame with your own.
- the second
reponameis the name of the folder you will be creating. - finally, navigate into your repo folder.
cd reponame
1
- IF you already created a folder for your project and have file inside the folder then you can
cdinside the folder and run thegit clonecommand from inside the folder. Just replace thereponamewith a period, like this.
git clone https://github.com/[YOUR USERNAME]/reponame.git .
1
- Again, if you already have files inside your GitHub version then you should download those files first.
git pull -u origin master
1
# 3. Adding Starter Files
- Sometimes you will have files that are provided for your assignment, like HTML or CSS or images in a Zip file on BSLMS. These need to be copied into the repo folder and then we need to tell Git to keep track of the files.
- In your Terminal (MacOS) | Command Shell (Windows), you should be inside your
reponamefolder and type the following:
git add -A
git commit -m "first files"
git push -u origin master
1
2
3
2
3
# 4. Modifying your Repo
- EVERY time you want to save your changes locally and then upload, use these same commands:
git status
git add -A
git commit -m "description of your changes"
git push -u origin master
1
2
3
4
2
3
4